Don’t Be Afraid of The Mess!
 GUEST POST: By Sandra Fisher, Earlychildhood News
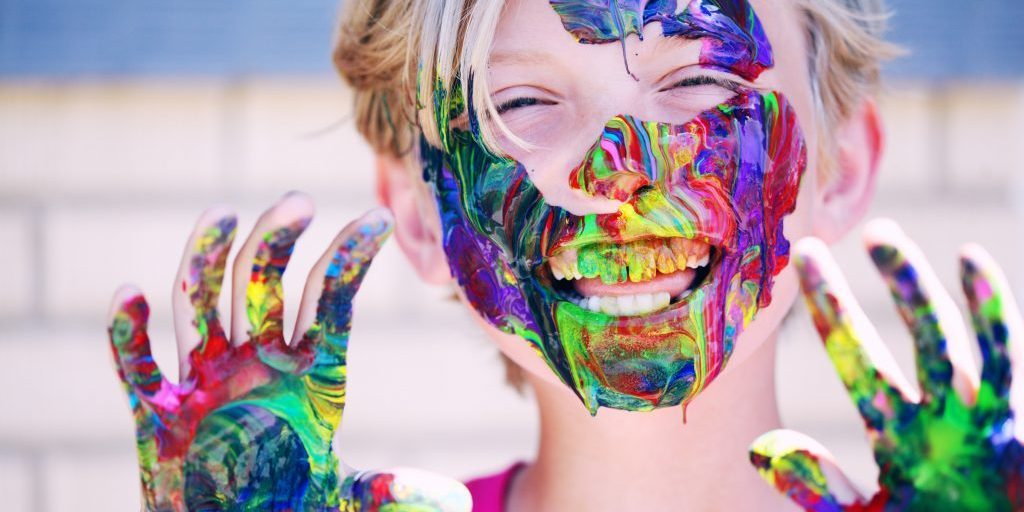
While painting together at the easel, Sonia and Ashley keep dipping their brushes into all of the paint containers. After they make a fascinating discovery that the paints have turned a muddy brown, the preschoolers abandon their brushes and begin to make handprints on the easel paper. Then, continuing this messy process, the four-year-olds giggle as they decide to paint-print each other’s faces!
Because young children frequently make a mess with art media, you need to think through about how you feel about the mess. For example, did you feel that the girls were developing their cognitive skills as they experimented with color mixing? Did they discover that paint could be applied with a tool other than a brush? Were they learning about the concept of cause and effect? Was this a pleasurable social interaction between friends? Or, were you more apt to feel that they were making a mess because they ruined all of the paints and got paint all over themselves?
With careful preparation, a well thought out arrangement of the environment, simple clean-up procedures, and a sense of humor, traditionally messy art activities, such as collage, paint, and clay can be a positive and enjoyable learning experience for everyone involved.
Setting-up for Messy Media
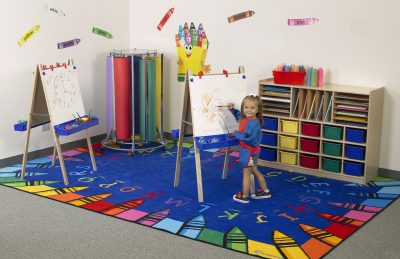
Organizing tools and materials ahead of time helps children to make choices by being able to see items at glance. If objects are disorganized to begin with, children are inclined to paw through the materials making an even greater mess. Use see-through boxes to hold and separate collage materials. Bring paint bottles to the table in a soda carrier. Provide weighted empty plastic bottles (put sand in the bottom) to securely hold an assortment of paintbrushes. Store clay in a small covered plastic garbage pail that can be easily moved to the art table. Place clay tools in a kitchen utensil caddy or a divided silverware basket from an old dishwasher.
Help define limits for the children’s messy projects. Use cafeteria trays, dress boxes lined with foil and clean Styrofoam vegetable and fruit-trays – all with raised edges – to physically contain individual collage, paint, or clay activities. Sections on a table outlined in utility tape help provide boundaries so one child doesn’t spread her mess into another’s territory.
Provide materials to cover up the children when it’s appropriate to keep the mess off them. Use old adults’ tee shirts with short sleeves for smocks. For really wet sloppy projects, create waterproof smocks with discarded, sanitized shower curtains or put on spongeable, child-size raincoats purchased at garage sales.
Cover your table and floor surfaces, too. Messy newspapers – free for the asking – can be bundled up and thrown away. Shower curtains or inexpensive plastic tablecloths can be sponged off or shaken out by enthusiastic young helpers.
Set up areas where individuals or small groups can work together comfortably without crowding. This keeps messy projects from becoming too overwhelming and spinning out of control. Four chairs and four paint trays send a clear message to children about how many participants can be involved in a project. Station a helpful staff member or a volunteer at a really messy activity to make suggestions and redirect “wild” experimenters.
Be sure to have enough materials prepared (papers cut to size, glue bottles filled) and available on site. This way, young children can continue to work independently in a place designed especially for the mess, rather than searching the classroom for the needed materials with messy hands.
Planning for an Easy Clean-up
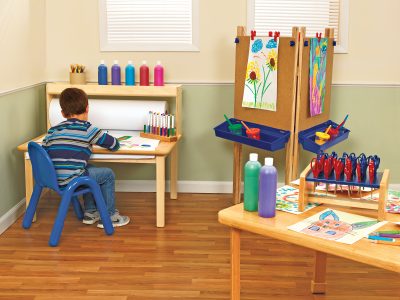
Our Whiteboard Easel makes it easy to keep paint and supplies close at hand.
You need to plan for the clean-up process before messy activities begin or you could be inviting problems. In thinking ahead, for example by covering the table with newspaper, you are helping to facilitate taking care of the mess from the beginning to the end of a project.
Your children will enjoy helping with this process if you make cleaning materials easily accessible. On the art table, put out paper towels and wet wipes so the children can remove gushy finger paint and squishy clay from their fingers. A thick cardboard strip can be used as a squeegee to remove excess finger paint from a cafeteria tray. Furnish sponges and spray bottles of water to clean tables, chairs, tools, or the tile floor. In a cooperative venture, your children can use a dustpan, broom, or hand brush to sweep collage scraps and dried clay bits off the floor.
If your art area is carpeted, try using a heavy vinyl sheet or shower curtain on top of the rug to catch glue and paint drips. Consider putting the table and chairs inside of a child’s large plastic wading pool to contain really messy clay pieces or spilled paint.
Have collection boxes handy to gather up used messy tools – finger-painting combs, splatter paint templates, clay sticks – to be washed later at the sink. Or, provide a small bucket filled with soapy water for soaking off glue and dried on clay particles. However, never soak paintbrushes in warm water as this loosens the glue and the bristles will fall out.
Encourage children to wipe off excess glue so the bottles aren’t sticky when they put them away. Use picture labels on open shelves so children can replace collage materials in the right place.
Locate an area out of the path of traffic to dry messy activities. A multi-lined clothes rack with clothespins works well to hang drippy paintings. Dry clay projects on wire or wooden racks. Carefully pick up heavy collages and dry them flat on sheets of waxed paper on shelves.
Collage
When the idea of using collage as an art medium is thought of, the word “mess” may come to mind. To prevent problems, organize and use materials in a planned space.
A collage project where you can use a specific space involves the use of shoeboxes and lids. Using different shoeboxes, gather and store like materials. For instance, one shoebox may have straws, while others may have packing squiggles, pieces of lace or ribbons. On the day of the collage activity, have your children select a shoebox. Keep the lid on the shoebox for added suspense to increase the children’s interest. When the shoebox has been selected, the children remove the lid and place the lid’s surface on the table. The inside of the lid then becomes the holder of the project’s materials. As the children remove the collage materials from the shoeboxes, the materials are glued to the inside of the lid. This confines the collage materials to a specific space and prevents a “mess.”

Creativity is squelched when kids are too worried about making a mess.
Because the children worked hard gathering all the materials at the discovery table, instead of throwing those materials away when they create a mess, use them in a “clean-up” collage. Give the children pieces of posterboard and glue. Have the children glue these “discovery” materials onto the posterboard. When all the materials are affixed, this collage may be displayed and labeled, documenting what learning occurred at the “Discovery Table.”
During daily clean-up times, objects are often found that seem to have no specific place. Collect and place those items in a container. Turn those “messy clean up” items into a classroom texture collage project. Using four pieces of posterboard, label each piece with a texture category: hard, soft, rough and smooth. The children can glue those items on the appropriate texture category. Through this collage project, the children classify the “messy clean up” objects and find a place for those items.
Paint
Paints, whether finger paint, watercolor, or tempera, provide many opportunities for creativity and learning. By arranging paints in a specific manner, painting no longer has to be considered a “messy” project.
A splatter paint art activity becomes “do-able” with the use of a shoebox, construction paper, plastic screening, brush (e.g. paintbrush, dog brush), and tempera paint. Line the bottom of a shoebox with construction paper. Have the children select an object (e.g. leaf, pinecone) from a collection of objects on a tray and put that object in the shoebox. Cover the top of the shoebox with plastic screening. For safety reasons, use plastic instead of wire screening. The children then dip a brush into tempera paint and “paint” the screening. This allows the paint to drop through the hole into the shoebox and onto the object and construction paper. When the object is removed, a silhouette of this object will appear, and the paint is confined to the shoebox.
Finger painting may be a “messy” activity, but putting a spoonful of this paint on a cafeteria tray confines the paint to a specific area. After the children have created a finger paint design, a print may be made by placing construction paper over the design, pressing it by hand and carefully lifting the paper.
Spray bottle art is fun when doing it at an easel. Line the “lip” of the easel with paper towels. Attach pieces of construction paper to the easel and give the children a spray bottle of liquid watercolor. The children can use their fine motor skills to squeeze or press the plunger of the paint bottle handle. As the paint is sprayed on the paper, any drops of paint drip into the easel lip. The paint “mess” is contained to the easel and is easily cleaned up.
Clay
Teachers often shy away from using natural or earthen clay because they feel it’s too messy or very difficult to care for. However, clay will provide a wonderful tactile experience for your children, quite different from the usual clay alternatives, such as play dough and plasticene.
Introduce clay with a “hands-on” experience. Have the children place a manageable grapefruit size ball on a plastic placemat or square of burlap (paper takes the moisture out of clay). Let them roll it, flatten it, pinch it, poke it, and pound it. Talk about how it feels and what’s happening to the shape. When the clay becomes dry, encourage the children to spray their hands with water, never the clay or it will become a slippery mess. Magically, clean up all of the little dried clay crumbs by patting them with a wad of moist clay.
Now your children are ready to use some tools and model with the clay. Let them explore making designs on pinched pots with Popsicle sticks, forks or buttons. Stick a handle on the pot with slip – a thin mixture of clay and water – which acts like glue. Accessories are fun to add to clay – put candles on an elegant birthday cake sculpture decorated with plastic flowers. After the children soak and scrub these items to remove any excess clay. Try putting them in a flat, waffle-weave, silverware container placed on paper toweling to drip dry.
To help your children investigate the properties of clay try a recycling project. If left exposed to the air over time, the clay hardens. Place it in a plastic bag (to keep the dust down). Two at a time, allow the children to pound it with wooden mallets. After the dried clay is in little chunks, add small amounts of water and knead it into the clay. This project may take several days. When moist and pliable, be sure to keep the revitalized clay in a small, clean, covered, plastic garbage pail. Now it’s ready to use again!
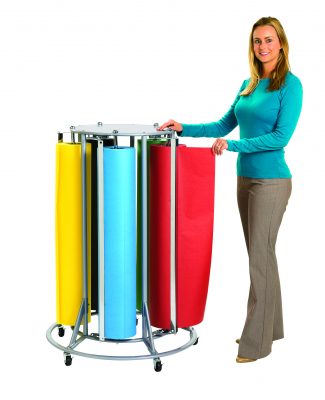
Keep art supplies organized with our mobile 5-Roll Paper Rack.
A Wonderful “Messy” Project
Combine the techniques and materials of collage, clay and paint for a totally “messy” fun frieze. Select a classroom texture collage that was made. Have the children make an impression by turning the collage over and pressing the objects into a clay slab. Carefully remove the clay slab and place it on a cookie or grill rack to dry. This allows the air to circulate around the clay. Put damp paper towels over the clay edges so that it will dry evenly. When the clay impression is thoroughly dry, carefully remove it from the rack with a spatula. It is now ready for your children to use tempera paint to paint highlights on the impression.
Conclusion
By organizing space and using materials in a confined area, “messy” art projects no longer need to be avoided but can be enthusiastically used.
Encouraging the Hesitant Child
When a child is reluctant to try messy activities, here are some ways to help her get involved:
- Give her plenty of time to observe and feel comfortable.
- Provide an area or chair for her to sit close by the project.
- Model the use of the messy material for the child.
- Describe what is happening as you work with the media and talk about how it feels.
- Introduce the materials very gradually. If she doesn’t want to touch a messy media, use a Popsicle stick to move finger paint, cut off a piece of clay, or spread some paste.
- Make the materials pleasing by warming the clay in your hands or using the child’s favorite color paint or collage material.
- Pair the reluctant child with a partner. Encourage her to make a decision about where to place the collage ribbon while the other child smears the paste on.
- Keep the same materials out for several days so she can gradually become involved.
- Give her a non-messy role to play during a group project such as putting down the placemats for a clay activity.
- Serve as a support, facilitator, and encourager when the child enters a project. Talk her through the activity. Say, “Look how the paint is spreading.”
- Have personal clean up materials handy (wet wipes or a bowl of soapy water) if the child is uncomfortable with any mess.
- Document the child’s successful participation with photos of her involvement.
- For the hesitant child, the involvement in the process is far more important than the product.
Controlling the Impulsive Child
Do you hate to see the impulsive child head for the art area? Here’s how to make the situation more manageable for everyone.
- Set simple limits. Explain, “The finger paint stays on the table.”
- Determine rules and procedures ahead of time. For example, decide whether the children will be allowed to mix the paints.
- Provide definable boundaries. State, “The collage materials are to be glued inside the lid.”
- Provide materials – paper towels, sponges, a broom – for quick, independent clean up.
- Display a picture chart identifying the project steps to help the child focus on the process.
- A small group or individual discovery session is a more calming experience than working in a large group.
- Eliminate waiting time. Put materials out ahead of time so the child can get started right away. Idle time encourages him to act impulsively and make a mess.
- Sit by this child as a calming influence and speak softly to him about his work.
- Have a special signal if he needs to slow down.
- Provide large sheets of paper to “go big” and use his gross motor skills.
- Offer materials that will allow him to “go wild” – wedge a large lump of clay or spray paint outdoors.
- Encourage and praise this child for his focused involvement in the total process – including cleaning up his mess.